Charming
Here is the exterior of the home in Alexandria, VA.

Keeping it Clean
Before we start any project we make sure to seal up any spaces that may get dirty along the way!

The Exterior before the Interior
Before we address the interior of the home, it is crucial to address the mold situation on the exterior of the home.

A Close Up
Here is a close up of the mold which we will mitigate my using Mold X2 Cleaner. This solution will not only deal with the issue at hand, but prevent future issues.

Mold x2 in Action
Here is the crew in action with the Mold x2

The Attic Before
Before our arrival, homeowners will have to help us clean up a little bit. After all of your cuisinarts and christmas decor is out, we will remove all of the old insulation (pink stuff).

Air Sealing
Once all of the old insulation is removed, we have to air seal any points of potential leakage of conditioned or outside air. The orange sealant you see on the floor is ZypFoam which will make sure all cracks and nooks and crannies are sealed.

Recess Lighting: The Other Side
Here is what the recess lighting looks like in your home on the other side! We will cover this with a can light cover which you will see in the following photo.

Can Light Covers
If you have recess lighting on the upper level of your home, this is a point of leakage and a fire hazard. These tan mounds are can light covers which will solve of both of these problems. They will fireproof your lighting system and seal any leaks.

Ready for Insulation
Here is what the attic will look when we are ready for insulation!

The Deck
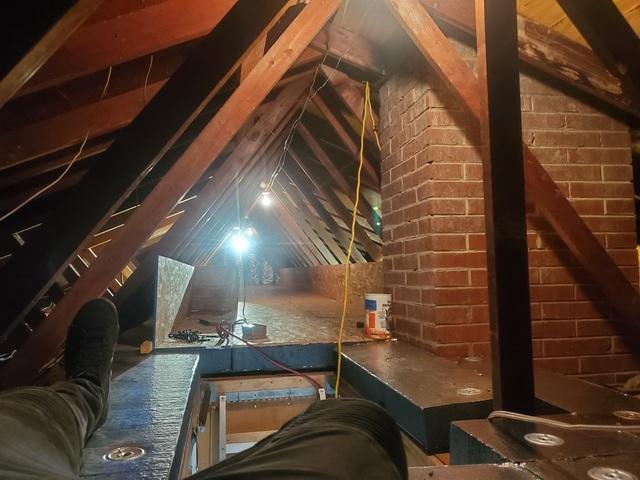
The primary thermal insulation we use is a fluffy blow-in insulation which makes it hard to use the space for anything else. If you would like to use a walkway or a space for storage we can build a deck like feature atop of the insulation so you can still utilize this part of your home. What we are looking at here is the deck which we have to install before we blow-in the Tru-Soft insulation. In the case of this home, we used SilverGlo insulation instead of the Tru-Soft beneath the deck (silver/grey cubes). Once the insulation below the deck and the deck itself are installed, we will blow in the Tru-Soft.

Getting Ready for Tru-Soft
Now that the deck is complete, it is time for the Tru-Soft!

Tru-Soft
The thick grey fluffy stuff you see is the Tru-Soft blow-in insulation. The bottom left side of the photo is the attic deck!

Half and Half
Here is a simple shot of the attic deck and the Tru-Soft!

The Final Stretch
After the attic is air sealed, insulated, and the deck is installed, we have to install the hatch cover! this is what we are looking at on top of the deck.

Attic Stair Door Insulation
The last component of this project is making sure that even the entrance is insulated. We will use a David Lewis Hatch cover to do this. You can zipper it open and closed from either side.

From The Inside
Here is what the hatch cover looks like from the finished upper level of the home.

Voila!
Here is the finished product! From the deck, to the Tru-Soft, to the hatch cover, here, we have a complete job!

The Second Part
In addition to insulating the attic, we extended the bath and kitchen vents through the roof.

The Reroute
This is one of the fans that we rerouted to vent through the roof.

On the Way
Here is a part of the duct work that will run the bath and kitchen vents through the roof.

The Vent
Here is a (blurry) picture of the vent routed through the roof! From Mold X2, to TiteShell Can Light Covers, to Tru-Soft, to butterfly air baffles, this house is finally complete.

